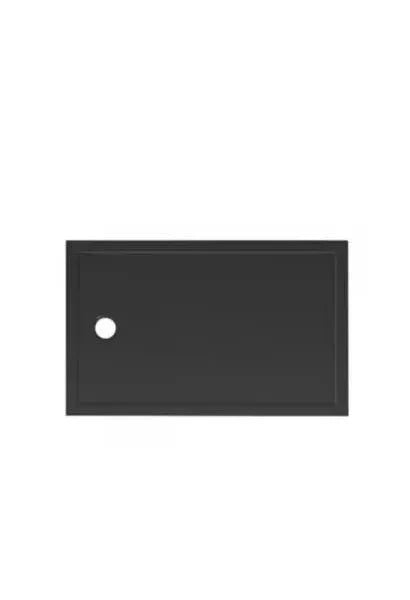
A non-slip shower tray is one whose surface is treated or textured to provide a secure grip for a wet, soapy foot. Its safety level is measured by slip resistance (Rd value) and categorized into classes: class 2 (C2) for wet floors and class 3 (C3), the highest, which is required in the shower area.
In a bathroom, the combination of water, soap, and bare feet makes the shower floor the most likely place to slip in the entire house. That is why it is not enough for a tray to be attractive or extra-flat: it must provide grip. In this guide, we explain what it really means for a tray to be non-slip, what classes C2 and C3 are, which one you need depending on the area of the bathroom, and how to choose wisely. The models we mention are taken from the actual product sheets in the Merkimarket shower tray catalog.
Key facts about non-slip shower trays
- What is measured: slip resistance (Rd), obtained using the pendulum test (UNE-ENV 12633 standard).
- Class 2 (C2): Rd between 35 and 45. Required for wet bathroom floors in general.
- Class 3 (C3): Rd greater than 45. The highest class, required for the shower tray and shower area by the CTE.
- Regulations: Technical Building Code, Basic Document SUA 1 (Safety against the risk of falls).
- Materials with the best grip: mineral-filled resin and slate-textured Stonex, and non-slip glazes on refractory clay.
- Important to remember: non-slip is not just about the material, but the surface finish; two trays made of the same material can have different classes.
Now you have the map; next, we will explain each idea so you can choose without making a mistake.
What is a non-slip shower tray and how is it measured?
"Non-slip" is not a marketing label; it is a measurable property. In Spain, the reference is the Rd value (slip resistance), which is obtained in a laboratory using the pendulum test described in the UNE-ENV 12633 standard. A slider is moved across the wet surface to measure how much friction it generates: the higher the number, the better the grip and the lower the risk of slipping.
That Rd value is grouped into four classes, from 0 to 3, which is the language used by the Technical Building Code (CTE), Basic Document SUA 1, dedicated to safety against the risk of falls. The key to a bathroom is understanding that wet floors and showers do not require the same class, which is why C2 and C3 appear together. A tray can be extra-flat, stylish, and made of premium material, yet still not reach the appropriate class if its finish is smooth: grip is provided by the surface texture, not just the material it is made of.
Classes C2 and C3 explained
The CTE translates the Rd value into numerical classes. On product sheets, you will often see them abbreviated as "C2" and "C3". This is the complete correspondence:
| Class | Rd value | Grip level | Where it is required |
|---|---|---|---|
| Class 0 | Rd ≤ 15 | None / slippery | Unsuitable for wet areas |
| Class 1 | 15 < Rd ≤ 35 | Low | Dry interior areas |
| Class 2 (C2) | 35 < Rd ≤ 45 | Medium-high | Bathroom and toilet floors (wet area) |
| Class 3 (C3) | Rd > 45 | Maximum | Shower tray and shower area, swimming pools, outdoors |
To put it simply: C2 is the reasonable minimum for bathroom floors where moisture accumulates, and C3 is what the shower tray itself must meet, because it is the surface that is always wet and soapy. If you are only going to look at one piece of information on a tray's product sheet, let it be that it meets Class 3.
Which class you need depending on the area of the bathroom
The common mistake is thinking that the entire bathroom needs the same level of safety. That is not the case, and understanding this will save you money and doubts:
- The shower tray: is the critical area. Constant water, soap, and bare feet. Here, the CTE requires Class 3 (C3) without exceptions.
- The rest of the bathroom floor: gets wet from splashes and wet footsteps, but it is not flooded. It is considered a wet interior area and requires Class 2 (C2).
- Adapted bathrooms or bathrooms for older people: it is advisable to reinforce and aim for the top end of Class 3, in addition to complementing it with grab bars and a flush-to-floor shower without a step.
That is why you will see trays that boast "Class 3 non-slip": they are declaring that their surface is suitable for the most demanding area. If you are renovating the entire bathroom, the most consistent choice is a floor covering that is at least C2 and a C3 tray.
Materials: how the finish affects grip
The material conditions the finish, but does not entirely determine it. These are the ones you will find in the catalog and their relationship with non-slip properties:
Mineral-filled resin. It is currently the most popular option for flush-to-floor showers. It is made with a surface layer (gel-coat) that is textured to imitate slate or stone, and that texture is exactly what provides the grip: many models reach Class 3. A good example is the Fossil Natura Esencial slate-textured resin shower tray, available in multiple sizes.
Stonex and stone loads. Shower trays from brands like Roca in Stonex material combine extra-flatness with textured non-slip surfaces. The Roca Terran extra-flat shower tray in white Stonex is a benchmark of this type, with a non-slip finish as standard.

Refractory clay and glazed porcelain. These are robust ceramic materials. In them, the non-slip property is achieved with a specific glaze applied to the surface, such as Unisan's Stepin finish. Not all ceramic trays have it: it is advisable to confirm it on the product sheet. The Unisan Stepin non-slip shower tray measuring 140x90 cm is a clear example, available in white, black, and gray.
Acrylic. Lightweight and warm to the touch, models designed for safety incorporate a textured non-slip base. It is important to look at it because smooth acrylic is more slippery than textured ceramic.

How to choose your non-slip shower tray in 6 steps
- Confirm the class on the product sheet. Look for the stepping area to declare Class 3 (or its C3 equivalent). This is the piece of information that takes precedence over the rest.
- Measure the opening carefully. Note the actual length and width and subtract the clearances. Trays are manufactured in standard sizes (70, 80, 90, 100, 120, 140 cm) and many resin ones are cut to size.
- Choose the material according to your use. Textured resin or Stonex if you want a flush shower and stone aesthetics; glazed ceramic if you prioritize hardness and cleanliness.
- Decide between extra-flat or flush-to-floor. Extra-flat (2.5-3.5 cm) reduces the step; flush-to-floor is the safest and most accessible, but requires lowering the floor.
- Check the drain. Check the diameter, whether the trap is included, and the drainage flow rate (liters/minute): a good drain prevents pooling that negates the non-slip property.
- Combine it with the rest of the bathroom. A C3 tray requires at least C2 flooring around it and, if it is for older people, grab bars and a safety mat.

Maintenance: preserve the grip without damaging the surface
The non-slip texture has a silent enemy: limescale and soap residue, which over time fill the micro-reliefs and reduce the actual grip below its original class. To preserve it:
- Rinse the tray with water after each use and use a squeegee; this prevents limescale from setting.
- Clean once a week with a neutral product or with water and a few drops of vinegar; avoid metal scouring pads and harsh abrasives, which scratch the finish.
- For resin and Stonex, do not use solvents or concentrated bleach: they can alter the gel-coat. Always follow what is indicated on the manufacturer's product sheet.
- If the tray is several years old and you notice it "slips more", it is often not worn out: it is encrusted with limescale. A deep cleaning restores much of the grip.
For a complete renovation, you will be interested in our guides on how to choose a shower tray by material, dimensions, and drain and, if you are going to install it yourself, the step-by-step guide on how to install a shower tray.
Frequently asked questions
What non-slip class does a shower tray need?
The highest: Class 3 (C3), which corresponds to an Rd value greater than 45 according to the CTE DB-SUA 1. It is required for the shower area, swimming pools, and outdoors, as they are surfaces that are always wet.
What is the difference between class C2 and C3?
C2 (Rd between 35 and 45) is the level required for wet bathroom floors in general, while C3 (Rd greater than 45) is the highest and is reserved for the shower tray and shower area. The higher the number, the better the grip with a wet foot.
Are all resin shower trays non-slip?
Not necessarily. The grip is provided by the surface texture (usually slate imitation), not by the fact that it is resin. Most textured resin models reach Class 3, but it is always advisable to confirm it on the product sheet of each tray.
Can I make a shower tray I already have non-slip?
There are non-slip treatments and paints for later application, but their durability is limited and they do not always certify a specific class. The safe and durable option is to start with a tray with a factory non-slip finish of Class 3.
Article written by the Merkimarket editorial team. The classes and Rd values correspond to the Technical Building Code (DB-SUA 1) and the pendulum test (UNE-ENV 12633). The specific non-slip class of each model is listed on its product sheet; consult it for the information currently in force in Spain.